By Kashif Mukhtar | Last Updated: May 27, 2026 | Reading Time: 18 minutes
You’ve purchased InstitutionKit School ERP. You’re excited about automating attendance, generating professional invoices, and finally ditching those Excel sheets that crash every exam season.
But here’s the uncomfortable truth: software doesn’t fix broken processes. People do.
After implementing InstitutionKit at 50+ schools across Pakistan — from single-campus community schools to 5-branch franchise networks — I’ve seen exactly what separates a smooth launch from a chaotic one.
The difference? A structured implementation plan.
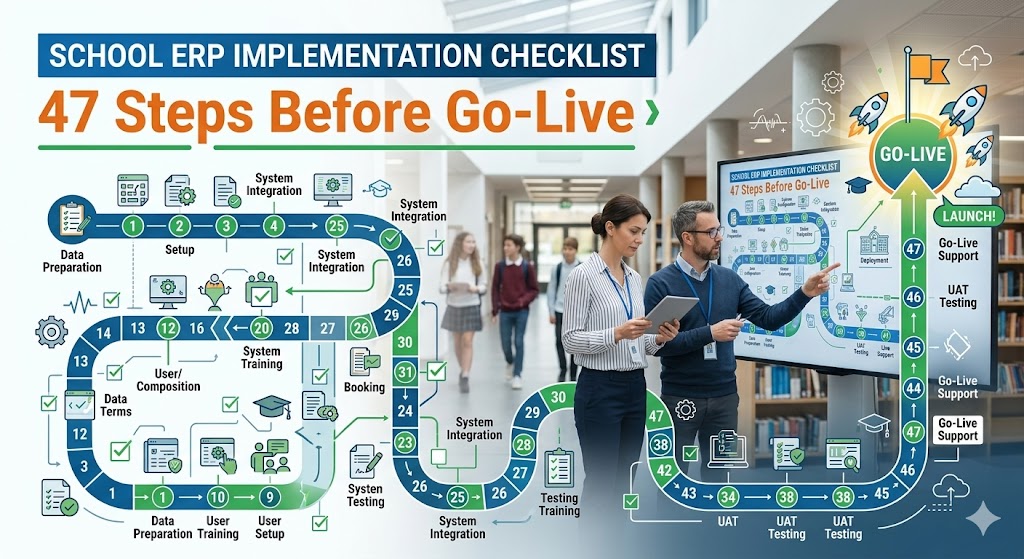
Here’s your complete 47-point checklist. Follow it in order, and you’ll be live in 2-3 weeks with minimal disruption.
Phase 1: Pre-Implementation Planning (Days 1–3)
Before you even install the software, get these 8 things right.
1. Identify Your Implementation Champion
Don’t make the principal do this alone. Appoint one person — ideally your IT coordinator or vice principal — who owns the implementation. This person:
- Has 2-3 hours daily for the next 2 weeks
- Understands basic WordPress (or is willing to learn)
- Can make decisions without constant approval
- Will train other staff later
Pro Tip: The champion shouldn’t be the busiest person in the school. If the principal is teaching 5 periods, handling admissions, and managing parents — this won’t get done.
2. Audit Your Current Data
Walk through every filing cabinet, Excel sheet, and register. List everything:
| What You Have | Where It Lives | Digital? | Needs Migration? |
|---|---|---|---|
| Student records | Blue register | No | Yes |
| Fee records | Excel file on accountant’s PC | Partial | Yes |
| Teacher attendance | Separate register | No | Yes |
| Exam results | Paper report cards | No | Yes |
| Staff salary details | Principal’s notebook | No | Yes |
Why this matters: You’ll discover data you forgot existed — and data you don’t actually need.
3. Decide What to Migrate (and What to Archive)
Not everything deserves a spot in your shiny new School ERP.
Migrate:
- Current students (active enrollments)
- Current staff (active employees)
- Current academic year fee structures
- Last 1 year of attendance records
- Current exam schedules
Archive (don’t migrate):
- Graduated students from 3+ years ago
- Former staff who left before last academic year
- Fee records older than 2 years
- Attendance from previous academic years
Pro Tip: Starting fresh with clean data is better than importing years of messy records. You can always add historical data later.
For more details read Database Maintenance & Migration
4. Standardize Your Naming Conventions
Nothing destroys data quality faster than inconsistent naming.
Decide before you start:
Classes:    "Grade 10" or "Class X" or "10th"?
Sections:   "A" or "Section A" or "Morning"?
Subjects:   "Mathematics" or "Maths" or "Math"?
Fee Types:  "Tuition Fee" or "Monthly Fee" or "Academic Fee"?
Campuses:   "Main Campus" or "City Campus" or "Branch 1"?
Pick one convention and enforce it ruthlessly. Your reports will thank you.
5. Map Your Organizational Structure
Draw your school’s hierarchy on paper first:
Super Admin (Owner/Director)
├── Campus Admin (North Branch)
│   ├── Teachers (15)
│   ├── Accountant (1)
│   └── Receptionist (1)
├── Campus Admin (South Branch)
│   ├── Teachers (12)
│   ├── Accountant (1)
│   └── Receptionist (1)
└── Finance Manager (Central Office)
    └── Assistant Accountant (1)
This determines your role assignments in Phase 3. Every person needs exactly the right access level — no more, no less.
6. Create a Data Cleanup Plan
Your existing data probably has issues. Fix them now:
- Duplicate students: Same child enrolled twice (check by father’s CNIC)
- Missing contact numbers: At least one parent phone per student
- Inconsistent dates: DD/MM/YYYY vs MM/DD/YYYY
- Missing roll numbers: Assign temporary ones if needed
- Guardian names with typos: Cross-check with admission forms
Pro Tip: Clean 10 records. Find patterns. Fix systematically. Don’t try to fix everything at once.
7. Set a Realistic Timeline
| Phase | Duration | Key Activities |
|---|---|---|
| Planning | 3 days | Audit, cleanup, conventions |
| Installation | 1 day | WordPress setup, plugin activation |
| Configuration | 5 days | Classes, fees, grade scales, roles |
| Data Migration | 3 days | Students, staff, fee structures |
| Training | 5 days | Role-by-role training sessions |
| Testing | 3 days | Parallel run with old system |
| Go-Live | 1 day | Switch over, monitor, support |
Total: ~3 weeks (longer for multi-campus or 1000+ students)
8. Communicate the Plan to All Staff
Before touching any software, send this email:
Subject: Important: Our School ERP Management System Is Going Digital
Dear Team,
Starting [date], we’re implementing InstitutionKit — a new school management system that will automate attendance, fee collection, exams, and report cards.
What this means for you:
- Teachers: Mark attendance from any device. No more paper registers.
- Accountants: Generate invoices in one click. Track payments automatically.
- Admins: View real-time reports across all campuses.
Timeline: Training begins [date]. System goes live [date].
Your role: Attend your department’s training session. Come with questions.
Questions? Contact [Implementation Champion].
Phase 2: Technical Setup (Days 4–8)
Now we install, configure, and lay the foundation of your School ERP..
9. Verify Server Requirements
Before installing, confirm your server meets these minimums:
✅ WordPress 5.8 or higher
✅ PHP 7.4+ (8.1+ recommended)
✅ MySQL 5.7+ or MariaDB 10.4+
✅ PHP Memory Limit: 256MB
✅ PHP Max Execution Time: 300 seconds
✅ PHP Extensions: mysqli, curl, dom, mbstring, gd
How to check: Go to Tools → Site Health → Info → Server in WordPress admin.
If you’re on shared hosting: Contact your host to increase limits. Most will do this for free.
10. Install InstitutionKit School ERP.Correctly
Don’t upload the ZIP through WordPress if it’s large. Use FTP instead:
- Download the plugin ZIP from your account
- Extract to your computer
- Connect via FTP (FileZilla or cPanel File Manager)
- Navigate to
/wp-content/plugins/ - Upload the extracted
institutionkitfolder - Go to Plugins → Installed Plugins
- Activate “InstitutionKit – School Management System”
What happens during activation:
- 47+ database tables created
- Default “Main Campus” created (code: MAIN)
- 11 grade scales inserted (A+ to F)
- 10 meeting topics inserted
- 15 expense heads inserted
- User roles created (Teacher, Accountant, Campus Admin, etc.)
This takes 30-60 seconds. Don’t refresh the page.
11. Activate Your License Immediately
The license popup appears automatically. If not, go to InstitutionKit → License.
License Key: IK-XXXX-XXXX-XXXX-XXXX
[Activate License Now]
Why now: The license removes the API Key reminder overlay and enables auto-updates. Activate before configuring — don’t let your staff see the reminder.
12. Configure Global Settings
Navigate to InstitutionKit → ⚙️ Settings:
Currency Symbol:   [Rs] or [$] or [PKR]
Date Format:       [DD/MM/YYYY] (Pakistan standard)
School Name:       [Your School Name]
School Address:    [Full Address]
School Phone:      [Contact Number]
School Email:      [Official Email]
Academic Year:     [2026-2027]
Current Term:      [First Term]
Pro Tip: The currency symbol appears everywhere — invoices, reports, fee structures. Get it right now to avoid reprinting invoices later.
13. Set Up Your First Campus
Navigate to InstitutionKit → 🏛️ Campuses → Add New:
Campus Name:   [Main Campus]
Campus Code:   [MAIN]  (2-10 characters, uppercase, unique)
Address:       [Complete address]
Phone:         [Campus contact number]
Email:         [Campus email]
Principal:     [Principal's full name]
Active:        [✓]
For multi-campus schools: Repeat for each branch. Use meaningful codes:
MAIN,NORTH,SOUTH,EASTCAMPUS1,CAMPUS2,CAMPUS3
14. Create Your Class Structure
Navigate to InstitutionKit → 🏫 Classes Management → Add Class:
Create every class, even if empty:
Grade 1, Grade 2, Grade 3, ..., Grade 10
OR
Class I, Class II, Class III, ..., Class X
OR
Nursery, KG, Prep, Class 1, ..., Class 10
Be consistent. Don’t mix “Grade 5” and “Class V”.
Pro Tip: Create all classes before adding sections. You’ll assign sections to classes next.
15. Set Up Sections
Navigate to Classes Management → Sections:
Section A, Section B, Section C
OR
Morning, Afternoon
OR
Boys, Girls
Taxonomy: Sections are a WordPress taxonomy (ik_section). Assign them to classes after creation.
16. Define Subjects
Navigate to Classes Management → Subjects:
English, Urdu, Mathematics, Science, History, Geography,
Computer Science, Islamiyat, Art, Physical Education
Pro Tip: Create ALL subjects your school offers across ALL grade levels. You’ll assign specific subjects to specific classes later via exam schedules.
17. Configure Grade Scales
Navigate to Exams → Grade Scales (or check default scales in database):
Default InstitutionKit grade scale:
A+  → 90-100%  → 4.00 GPA
A   → 85-89%   → 4.00 GPA
A-  → 80-84%   → 3.70 GPA
B+  → 77-79%   → 3.30 GPA
B   → 73-76%   → 3.00 GPA
B-  → 70-72%   → 2.70 GPA
C+  → 67-69%   → 2.30 GPA
C   → 63-66%   → 2.00 GPA
C-  → 60-62%   → 1.70 GPA
D   → 50-59%   → 1.00 GPA
F   → 0-49%    → 0.00 GPA
Customize if needed. Some schools use different thresholds. Adjust before generating any report cards.
18. Set Up Fee Types
Navigate to Fee Management → 🏷️ Fee Types:
Monthly Tuition Fee
Monthly Transport Fee
Annual Registration Fee
Examination Fee
Library Fee
Computer Lab Fee
Sports Fee
Admission Fee (one-time)
Security Fee (refundable)
Naming convention: Start with “Monthly” for recurring fees. The invoice generator uses this to identify which fees to add each month.
19. Create Fee Structures
Navigate to Fee Management → 📐 Fee Structures:
Structure: "Primary Wing (Grade 1-5)"
├── Monthly Tuition Fee: Rs 3,500
├── Monthly Transport Fee: Rs 1,500
├── Library Fee: Rs 300
└── Total: Rs 5,300

Structure: "Secondary Wing (Grade 6-10)"
├── Monthly Tuition Fee: Rs 4,500
├── Monthly Transport Fee: Rs 1,500
├── Computer Lab Fee: Rs 500
├── Library Fee: Rs 500
└── Total: Rs 7,000
Pro Tip: Create separate structures for transport-only students, hostel students, etc. Students can have multiple structures assigned.
20. Configure Expense Heads
Navigate to Payroll & Expenses → 🏷️ Expense Heads:
15 default heads are pre-loaded. Add your school’s specific categories:
Building Rent
Utilities (Electricity, Gas, Water)
Staff Salaries (teaching)
Staff Salaries (non-teaching)
Maintenance & Repairs
Stationery & Supplies
Examination Expenses
Sports & Events
Transportation
Marketing & Advertising
21. Set Up Grading Periods (New System)
Navigate to Student Management → All Grading Periods → Add New:
Period 1: "Monthly Assessment - August"
Period 2: "Monthly Assessment - September"
...
Mid-Term Examination
...
Final Examination
Why this matters: The enhanced gradebook (ik_grades_v2) uses periods for multi-assessment tracking. Each period has start date, end date, and weight.
22. Install the Frontend Portal Pages
Create these WordPress pages with shortcodes:
| Page Title | Slug | Shortcode | Visibility |
|---|---|---|---|
| Mark Attendance | mark-attendance | [ik_frontend_attendance] | Password Protected |
| Apply for Admission | apply-for-admission | [ik_admission_form] | Public |
| Manage Invoices | manage-invoices | [ik_frontend_invoices] | Password Protected |
| My Grades | my-grades | [ik_student_grades] | Logged-in Users |
| Verify Certificate | verify-certificate |
| Public |
| Parent Portal | parent-portal | [ik_parent_dashboard] | Logged-in Users |
| Book Meeting | book-meeting | [ik_book_meeting] | Logged-in Users |
23. Add Your School Logo
Replace the default logo:
- Go to
/wp-content/plugins/institutionkit/assets/images/ - Replace
logo1.pngwith your school logo - Keep dimensions ~200px wide, PNG format
- Clear browser cache to see the change
This logo appears on invoices, PDFs, and report cards.
Phase 3: User & Role Setup (Days 8–10)
24. Create WordPress User Accounts for All Staff
Go to Users → Add New for each staff member:
Username:    [firstname.lastname]
Email:       [official school email]
Password:    [temporary — force reset on first login]
Role:        [see below]
Role assignment:
| Staff Type | WordPress Role | IK Access Level |
|---|---|---|
| Owner/Director | Administrator | Full access |
| Branch Head | Campus Admin | Single campus |
| Accountant | Accountant | Finance only |
| Teacher | Teacher | Attendance, grades |
| Receptionist | Receptionist | Basic data entry |
| Parent | Parent | Child’s data only |
25. Assign Staff to Campuses
Navigate to Campuses → Assign Users:
User: [Select Teacher]
Campus: [North Branch]
Role: [Teacher]
[Assign User]
Critical check: A Campus Admin assigned to “North Branch” must NOT be able to see “South Branch” data. Test this.
26. Create Staff Records in Payroll Module
Navigate to Payroll & Expenses → 👥 Staff → Add New:
Full Name:        [As per CNIC]
Email:            [Official email]
Phone:            [Contact number]
Role:             [Teacher (Permanent)]
Primary Campus:   [North Branch]
Contract Type:    [Monthly Fixed]
Base Salary:      [Amount]
Join Date:        [DD/MM/YYYY]
Bank Details:     [Account number, bank name]
Why separate from WordPress users: Staff records contain salary, bank details, and contract information. WordPress users handle login access. They’re linked by user_id in the staff table.
27. Define Salary Components
For each staff member, add earnings and deductions:
John Doe - Salary Components:
├── EARNINGS:
│   ├── Housing Allowance: Rs 8,000 (non-taxable)
│   ├── Transport Allowance: Rs 3,000 (non-taxable)
│   └── Medical Allowance: Rs 2,000 (non-taxable)
├── DEDUCTIONS:
│   ├── Provident Fund: Rs 2,500
│   └── Health Insurance: Rs 800
└── NET = Base + Earnings - Deductions
28. Set Up Student User Accounts (Optional)
If you want students to view their own grades:
- Create WordPress users with “Student” role
- Link to student profile via user meta
Alternative: Most schools use the Parent Portal instead. Parents log in; students don’t need separate accounts.
29. Create Parent User Accounts
For each family, create one or both parent accounts:
Username: [father.phone] or [mother.phone]
Role: Parent
[Link to child after account creation]
Navigate to Parent Management → Link Parent to Student:
Parent: [Select Parent User]
Student: [John Doe - Grade 5]
Relationship: [Father]
Primary: [✓]
Pro Tip: Use phone numbers as usernames. Parents remember their phone number; they won’t remember a random username.
30. Test Each Role’s Access
Log in as each role type and verify:
| Check | Admin | Campus Admin | Teacher | Accountant | Parent |
|---|---|---|---|---|---|
| Can see InstitutionKit menu? | ✅ | ✅ | ✅ | ✅ | ❌ |
| Can see all campuses? | ✅ | ❌ | ❌ | ❌ | ❌ |
| Can mark attendance? | ✅ | ✅ | ✅ | ❌ | ❌ |
| Can view all students? | ✅ | Only campus | Assigned classes | ❌ | Own children |
| Can generate invoices? | ✅ | ✅ | ❌ | ✅ | ❌ |
| Can view financial reports? | ✅ | ✅ | ❌ | ✅ | ❌ |
| Can add new users? | ✅ | ❌ | ❌ | ❌ | ❌ |
If anything is wrong: Check role capabilities at InstitutionKit → Settings → Capabilities.
Phase 4: Data Migration (Days 10–12)
31. Migrate Students First
Method 1: Bulk Import (Recommended)
- Prepare a CSV with: Name, Father’s Name, DOB, Gender, Class, Roll Number, Father’s Contact
- Use the bulk import tool (Enterprise plan includes assisted migration)
Method 2: Manual Entry
- Navigate to Student Management → Add New Student
- Enter one student at a time
- Use this for small schools (< 100 students)
32. Assign Students to Classes
After migration, verify every student has a class:
-- Quick check query
SELECT COUNT(*) FROM wp_posts
WHERE post_type = 'ik_student'
AND post_status = 'publish';
-- Should match your expected student count
Navigate to Student Management → All Students. Spot-check random students for correct class assignments.
33. Assign Students to Sections
If you use sections (A, B, C), assign each student:
Student: John Doe → Grade 5 → Section A
Student: Jane Smith → Grade 5 → Section B
Bulk assignment: Use the Student Management page to filter by class, select multiple students, and bulk-assign sections.
34. Assign Fee Structures to Students
Navigate to Fee Management → 📌 Assign Fees:
Class: [Grade 5]
Fee Structure: [Primary Wing Package]
Start Date: [Current month start]
[Assign to All Students in Class]
Individual adjustments: For students with sibling discounts, scholarships, or custom fees, assign individually after bulk assignment.
35. Migrate Staff Attendance (Optional)
If you want historical attendance for payroll:
-- Insert past attendance records
INSERT INTO wp_institutionkit_staff_attendance
(staff_id, campus_id, attendance_date, status)
VALUES
(1, 1, '2026-06-01', 'present'),
(2, 1, '2026-06-01', 'absent');
Alternative: Start fresh from current month. Historical attendance isn’t critical for most schools.
36. Migrate Current Fee Balances
If students have outstanding balances from your old system:
Create manual invoices for the transition period:
- Navigate to Fee Management → Invoices
- Generate invoice for each student with outstanding balance
- Add line item: “Previous Balance (from old system)”
- This ensures accurate financial records going forward
37. Verify Data Integrity
Run these spot checks:
✅ Total students in system = Total students in old register
✅ Each student has a class, roll number, and guardian contact
✅ Each staff member has salary details and campus assignment
✅ Fee structures are assigned to all students
✅ No duplicate entries
✅ Guardian phone numbers are correct (call 5 random parents)
Pro Tip: Print the student list and have each class teacher verify their class in 10 minutes. They’ll catch errors you missed.
Phase 5: Staff Training (Days 12–17)
38. Train by Role, Not All at Once
Don’t gather everyone in one room. Train in small, role-specific groups:
Session 1: Administrators (2 hours)
- Dashboard overview
- Campus management
- User role setup
- Settings configuration
- Report generation
Session 2: Accountants (3 hours)
- Fee type and structure creation
- Invoice generation and payment recording
- Expense management
- Payroll processing
- P&L report interpretation
Session 3: Teachers (1.5 hours)
- Frontend attendance marking (not backend!)
- Gradebook entry
- Homework assignment
- Meeting slot creation
- Parent communication
Session 4: Receptionists (1 hour)
- Student inquiry recording
- Admission form processing
- Basic student search
39. Create Quick Reference Cards
Don’t rely on memory. Print these one-page guides:
Teacher Quick Card:
MARK ATTENDANCE:
1. Go to [school-url]/mark-attendance
2. Select Class → Section → Date
3. Mark Present/Absent/Late/Leave
4. Click Save

Password: [shared password]
Accountant Quick Card:
GENERATE MONTHLY INVOICES:
1. Fee Management → Invoices
2. Select Class
3. Click Generate/Update Invoices
4. Wait for confirmation
5. Click Send Invoice Emails (if needed)

RECORD PAYMENT:
1. Find invoice → View
2. Enter amount, date, method
3. Click Record Payment
Laminate these. Place them near computers. Trust me on this.
40. Record Video Tutorials (30-60 seconds each)
Using Loom, ScreenPal, or your phone:
- “How to Mark Attendance” (45 seconds)
- “How to Enter Exam Results” (60 seconds)
- “How to Generate an Invoice” (45 seconds)
- “How to Record a Fee Payment” (30 seconds)
- “How to Download a Report Card” (30 seconds)
Share these in your staff WhatsApp group. They’ll watch a 60-second video more willingly than read a 10-page manual.
41. Set Up a “Sandbox” for Practice
Before going live, let staff practice:
- Create a test class (e.g., “Training Class”)
- Add 3-5 dummy students
- Let each teacher practice attendance, grades
- Let accountant practice invoices on test students
- Delete test data before going live
Pro Tip: Use obvious dummy names like “Test Student 1” so nobody confuses them with real students.
42. Address the “We’ve Always Done It This Way” Objections
Common pushback and responses:
| Objection | Response |
|---|---|
| “Paper registers are faster” | “Frontend attendance takes 2 minutes per class. No counting absentees manually. No lost registers.” |
| “I don’t understand computers” | “If you can use WhatsApp, you can use this. It’s a form with radio buttons.” |
| “What if the system crashes?” | “We have daily backups. Plus, you still have your paper register for emergencies.” |
| “Parents won’t use the portal” | “They don’t have to. But the ones who do will stop calling you for grades.” |
43. Train One “Power User” Per Department
Identify one tech-savvy person per department who:
- Completes training first
- Helps colleagues during the first week
- Becomes the go-to person for questions
- Escalates issues to the implementation champion
This reduces the burden on you and creates internal expertise.
Phase 6: Testing & Parallel Run (Days 17–20)
44. Run a Parallel Week
For one full week, do everything TWICE:
| Task | Old System | New System |
|---|---|---|
| Mark attendance | Paper register | InstitutionKit |
| Record fee payment | Excel sheet | InstitutionKit |
| Generate invoice | Manual receipt | InstitutionKit |
| Enter exam results | Paper mark sheets | InstitutionKit |
Compare results. If they match, you’re ready. If they don’t, find the discrepancy before going live.
45. Test Edge Cases
Don’t just test normal operations. Test these scenarios:
✅ Student transfers from Section A to Section B mid-term
✅ Parent pays partial fee (not full amount)
✅ Teacher marks "Late" and adds remarks
✅ Two accountants record payments simultaneously
✅ A student is absent for 3 consecutive days
✅ Exam schedule changes after publishing
✅ Fee structure changes mid-year
✅ Staff member resigns — final settlement
Each edge case you test now prevents a panic situation later.
46. Test the Parent Portal Experience
Log in as a test parent and verify:
✅ Can see all linked children
✅ Attendance shows correct status
✅ Grades match what teachers entered
✅ Invoices show correct amounts
✅ Can book a meeting slot
✅ Can download report card PDF
✅ Portal works on mobile phone
✅ Portal works on a slow 3G connection
Pro Tip: Ask one real parent (maybe a teacher’s spouse) to test and give honest feedback.
Phase 7: Go-Live Day (Day 21)
47. Execute the Go-Live Checklist
Morning (before school starts):
- [ ] Verify daily backup is working
- [ ] Check all user accounts are active
- [ ] Confirm fee structures are assigned
- [ ] Test attendance marking with one class
- [ ] Post announcement: “System is now live. Use InstitutionKit for all tasks.”
- [ ] Have implementation champion available ALL DAY
During school hours:
- [ ] Walk through each department at their task time
- [ ] Teacher attendance: Be present when first teacher marks attendance
- [ ] Fee collection: Be present at accounts office
- [ ] Collect feedback: “What’s confusing? What’s working?”
End of day:
- [ ] Verify all attendance was saved correctly
- [ ] Verify all payments were recorded
- [ ] Run a quick backup
- [ ] Send summary email to all staff: “Day 1 complete. 98% attendance marked. 15 payments recorded. Great job!”
- [ ] List 2-3 issues to fix tomorrow (there will be some — that’s normal)
🎉 Post-Go-Live: First Month
| Week | Focus |
|---|---|
| Week 1 | Support, support, support. Be visible. Answer questions instantly. |
| Week 2 | Check data quality. Are teachers marking attendance daily? Are payments recorded? |
| Week 3 | Generate first monthly invoices. Verify all students got invoices. |
| Week 4 | Generate first monthly P&L report. Review with management. |
📊 Success Metrics: How to Know You’ve Succeeded
After 1 month, measure:
| Metric | Target |
|---|---|
| Daily attendance marked | 100% of working days |
| Fee payments recorded in system | 95%+ of payments |
| Teachers using frontend (not backend) | 100% |
| Parent portal logins | 30%+ of parents |
| Support tickets resolved | 95%+ within 24 hours |
| Staff satisfaction | “Would you go back to paper?” — 0% say yes |
🆘 Need Help?
InstitutionKit Enterprise customers get complimentary implementation support including:
- Remote setup assistance
- Data migration support
- Staff training sessions (via Zoom)
- 30 days of post-go-live priority support
Contact us:
- Kashif Mukhtar developer
- 📞 +92 300 455 1325
- 📧 [email protected]
- 🌐 institutionkit.com
About the Author: Kashif Mukhtar is the creator of InstitutionKit School ERP., a complete school management ERP for WordPress. He has helped 50+ schools across Pakistan digitize their operations — from single-campus community schools to 5-branch franchise networks.
Ready to start your implementation? Get InstitutionKit →